
So you’re thinking about changing your domain name and feel like you’re staring at a mountain? Good news – it’s more like a small hill! If you’re not familiar with the process, it may seem intimidating, but I promise you’ll be able to do it in less than an hour – no help needed. Even if you’re not good at websites or coding, it’s completely up to you. Just follow the steps below and you’ll be good to go.
I’ve managed many WordPress migrations – be it moving servers, switching domains, or switching platforms. Although URL transfers require some careful steps, they can be completely handled by anyone in less than an hour!
1. Reveal: Have Full Access to All Accounts
Make sure you have full access to everything you need. This means having administrative access to your WordPress backend, hosting account and cPanel. You’ll also need access to wherever your new domain is registered. In many cases, your domain will be registered with your hosting provider, but if not, make sure you have access to it as well.
Once installed, go ahead and sign in to all these accounts in separate tabs of your browser.
2. Back up your website
Before making any major changes like URL switching, it’s smart to get a backup of your site – just in case something goes wrong.
A) If you are already using the backup plugin, go ahead and run a fresh backup, then download all the important files, especially the MYSQL database backup.
B) If you’re not already using a backup manager (and you really should be!), go to your WordPress dashboard and go to “Plugins > Add New Plugin”. I recommend UpdraftPlus; is a reliable, free option. Install and activate it to ensure your backup.

Create a new backup in the plugin’s interface and download all relevant files.
3. Specify your domain
We need to make sure your new domain is pointing to the correct directory.
If your domain is registered with the same hosting account, follow step 3A. If registered to a different account or platform, go to step 3B.
3A. If Your Domain Is Registered to the Same Hosting Account:
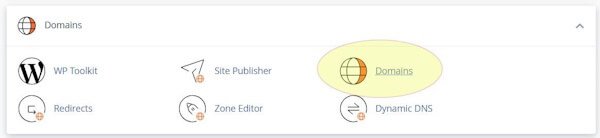
Log in to your hosting account and go to cPanel. After logging in to CPanel, click on “Domains”.

On the next screen, check the “Document Root” next to your new domain to make sure it points to the correct folder. If your website is located in another folder within “/public_html”, use the “Manage” button to adjust the settings as needed.

3B. If Your Domain Is Registered on a Different Platform:
Start by finding the name servers for your hosting account. Typically, you can find this information by searching online for your hosting company’s name along with “name servers.” Note that if you’re using a VPS, the nameservers you find online may be different, so it’s best to consult your hosting documentation for the most accurate information.
Next, log in to the account where your domain is registered. The procedure for changing your domain’s nameservers will vary depending on your provider, but you’ll generally find this option in the domain settings where you manage and edit your nameservers.

Update the name servers to match those provided by your hosting account. This change will redirect your domain to your hosting account and make your hosting provider responsible for all DNS entries. After saving these changes, log back into your hosting account and follow the instructions in the previous step to add the new domain and verify that it points to the correct directory.

4. Enable SSL
If you have already purchased an SSL certificate for your new domain, now is the time to install it. If not, don’t worry – most cPanels offer free AutoSSL depending on your hosting package. Before making any URL changes, it is very important to ensure that SSL is installed.
Login to cPanel in your hosting account, then go to “Security” and click on “SSL/TLS Status”.

On the next screen, find your new domain in the list. Click the “Run AutoSSL” button and wait a few minutes for the process to complete. Once complete, you should see a green circle next to your domain name indicating that SSL is enabled.
If you have recently updated your name servers, SSL may not be activated immediately. In some cases, you may have to wait an hour or even 24 hours, but it usually starts within ten minutes.

5. Update WP-Config
Now it’s time to update your website files with the new URL. We’ll do this by editing the wp-config.php file to hardcode the new URL and file location.
In cPanel, go to “Files” and click on “File Manager”.

Double-click the “public_html” folder where your WordPress files are stored. If your files are in a subfolder, go there instead.
Scroll through the list of files until you find wp-config.php. Click on it to highlight it and select “Edit” from the top menu. Note that the editing method may vary slightly depending on your cPanel setup.
After the “@package WordPress” line in the file, add the following lines, replacing yourdomain.com with your actual domain:
| Define (‘WP_HOME’, ‘https://yourdomain.com/’); Define (‘WP_SITEURL’, ‘https://yourdomain.com/’); |
If your website is located in a subfolder within public_html, include this in the URL. For example:
| Define (‘WP_HOME’, ‘https://yourdomain.com/mywebsite/’); Define (‘WP_SITEURL’, ‘https://yourdomain.com/’); |

Save the changes and you are now ready to access your site using the new URL.
6. Sign in
Now it’s time to access your site using the new URL. Go to the new login page at https://yourdomain.com/wp-admin. Use your regular administrative username and password to log in – everything should work as before.
7. Search and replace
Next, you need to update your database to replace all instances of the old domain with the new one. It’s a simple and effective way to make sure everything fits.
Go to “Plugins” in your WordPress dashboard and click “Add New”. Search for the Better Search and Replace plugin, install it, and then activate it.

Once enabled, go to Tools > Replace Better Search.
In the “Search” box, enter your old domain name (without https:// or trailing slash). Enter your new domain in the “Replace” box.

In the Additional Settings section, check the “Unranked” box and uncheck “Run as a dry job”.
Very important: Before clicking the “Run/Change Search” button, double check to make sure the domains are spelled correctly.

If everything looks correct, proceed with running the search and replace function.
7. WordPress permalinks
Sometimes, URLs can stop working even if everything looks perfect after migration. To fix this, go to “Settings” > “Permalinks” in your WordPress backend.
On this page, even though no changes have been made, scroll down and double-click the “Save Changes” button. This operation helps update your permalink structure.
Your website should now be running smoothly! However, we still have a few steps to complete.
8. Forward your old domain
The simplest way to set up redirection is through cPanel. Log in to your hosting account and log in to cPanel. Go to Domains and click on Redirects.
In the redirect settings, select “Permanent (301)” from the drop-down menu for redirect type. Next, select your old domain name from the next drop-down field. Leave the third field blank to redirect the entire site. In the “Redirects” field, enter the full URL of your new domain, including https://.
Check both the “Redirect with or without WWW” box and the “Wildcard” box for redirect rules. Finally, click the “Add” button to implement the redirect.

After setting up the redirection, it is important to test that it is working properly. Enter the old page URL in your browser (preferably an internal page, just the main page) and check that it redirects to the corresponding page on the new domain. If the redirect is not working as expected, make the necessary adjustments.
9. Update related sites
Now that your new domain is active, it’s important to update all related platforms and sites. Start by revising your social media profiles to reflect the new domain, ensuring links and references are up to date. Don’t forget to update other related sites where your domain may be listed, such as directories, partner sites, or business listings.
Additionally, inform your customers and the public about the domain change. This can be done through an email newsletter, social media announcements and updates on your website. Clear communication will help avoid confusion and ensure a smooth transition for everyone involved.
10. If things fail, use backup!
If you run into any problems or the transfer doesn’t go as planned, don’t panic. You can always go back to the backups you created earlier. These backups will allow you to restore your site to the state it was in before the changes were made. To restore from saved backup files, simply follow your backup plugin’s instructions. This safety net ensures that you have a backup option that gives you peace of mind and the ability to resolve any issues without losing valuable data.