

So, you are about to start your own blog using the WordPress platform. You have bought hosting and domain and you have installed WordPress. Now what?
Now it’s time to design your blog using the tools provided in your WordPress backend. There’s a lot to go through when customizing your WordPress blog, so we’ve provided a step-by-step guide to get you started.
1) Login to your WordPress blog backend to open the dashboard
Easily access the backend of your blog by going to yourdomain.com/wp-admin (replacing yourdomain.com with your domain name). This will display the login page.
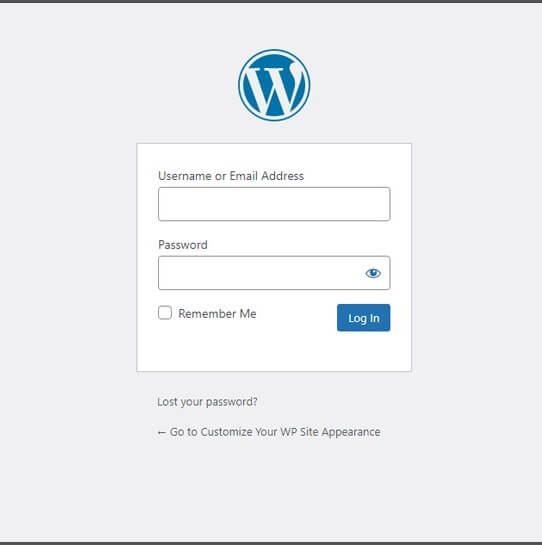
Enter the username and password you saved when you originally installed WordPress on your hosting account. Check the “Remember me” box for faster access. Once logged in, you will be taken to the dashboard, which is a fully functional website management console.
2) Adjust your blog name and tagline
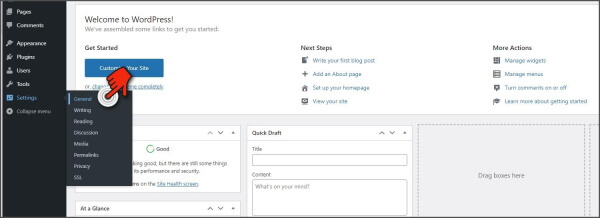
In the dashboard, in the left column, you will see a list of menu items. The first thing you should do is edit your website/blog name and tagline, as the tagline always shows the general line: Just another WordPress site. Chances are you won’t even use the tagline, but just in case – let’s edit it.
Hover over in the left menu ‘Settings’ and click on it ‘common’ in the drop-down menu.
Adjust your blog name and tagline in the fields provided.

When done, scroll down and tap ‘Save changes’.
Note: Open a new tab at any time and switch to your domain to see changes reflected immediately!
3. Change your permalinks.
The next thing to do is to change the structure of your permalinks. It is preferable that your page and blog post URLs take the name of the relevant post titles as this helps SEO. So instead of the URL being named after the article ID number or the date it was published, we’ll automatically assign the title of the post to the URL.
go to ‘Settings’ and then ‘Permalinks’. On this page, click on “Post Name” to change the permalink structure.

Click below ‘Save changes’.
4. Create Your Two Main Pages: Home and Blog.
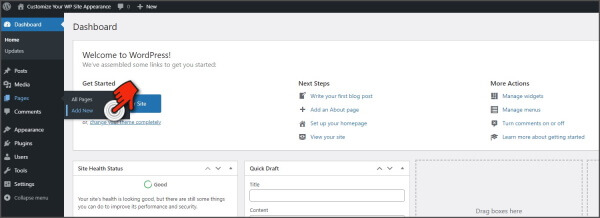
These two pages must be created and set up before moving on to more detailed customizations. Hover over the course in the dashboard ‘Pages’ in the left menu and then click on ‘Add New’ in the drop-down menu.
The editor will open and provide space for your page title. add ‘home’ go to the title and tap ‘Publish’ on the upper right. You can fill out the page later. For now, we’re just laying out the framework.

After publishing, click the WordPress icon in the top left to return to your dashboard and it will take you to your current page. press ‘Add New’ above and create a new page again using the header ‘Blog’. Return to the dashboard.
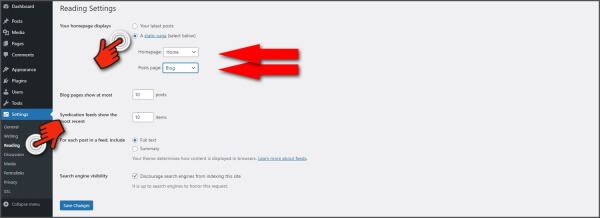
You now have two main pages published and ready to go. But first we need to define them. These are the two pages that need to be set in the dashboard settings. Swipe on it again ‘Settings’ and click now ‘read’.
To change ‘Showing your home page’ for ‘Static Page’. Later on ‘Home’ pops up, select ‘home’. And from “Posts Page” select the drop-down menu ‘Blog’. Then click ‘Save changes’.
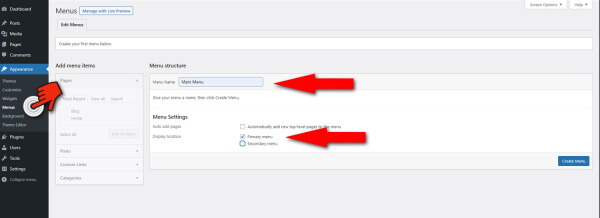
Hover over the course in the dashboard ‘View’ on the left and click on ‘Menus’ in the drop-down menu. If no menu has been created, create a new menu and name it Main Menu. Make sure “Main Menu” is marked, no “Second Menu”. Then click “Save menu”.
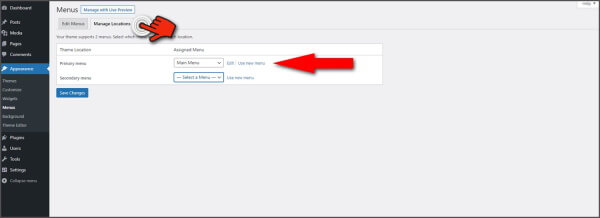
If the main menu is already set up, make sure it is placed in the appropriate place. At the top of this page, click the icon that says ‘Manage locations’ and then set “Main Menu” for “Play Menu”. press ‘Save changes’.
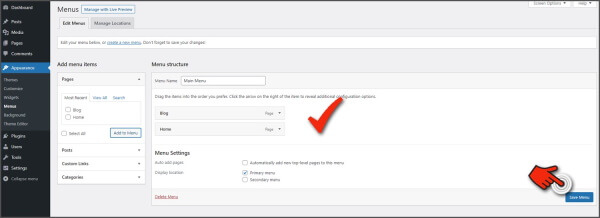
Now add your two pages to this main menu. Click on it using the icon above “Edit Menus”. Check in the left box ‘Blog’ and ‘home’ and then click on “Add to menu”.

After adding them to the menu, the homepage and blog pages will appear. You can reorder them with simple drag and drop. press “Save menu” to conclude.
6. Choose a theme.
Go to the dashboard ‘View’ and then ‘Topics’ in the drop-down menu. Only a few basic WP themes will be listed, and the theme your blog uses comes first. press ‘Add New’ To choose a new theme from the WP repository.
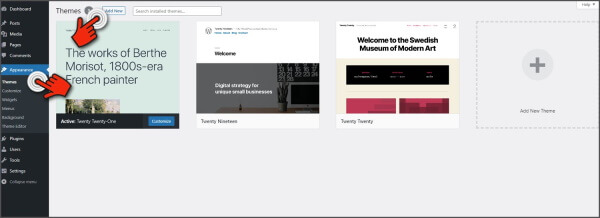
Use the menu above the themes to find the perfect theme for your blog. Use the filters to search for the features you want included in your theme. Once you find the perfect theme, click on it and then ‘Install’ on the upper left. Once installed, tap ‘Activate’ in the box that appears.
7. Customize your theme.
In the dashboard, go to “Appearance” and click “Personalize” in the drop-down menu. This will bring you to a new screen where you can preview the changes to your blog design.
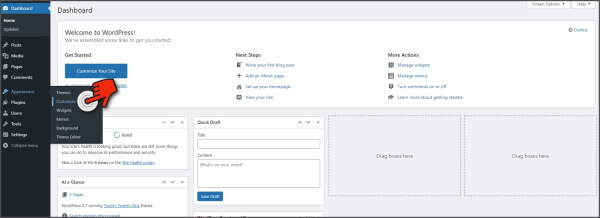
In this example, I am using the basic WordPress Twenty Twenty-One theme. Other themes may give you more options to choose from in this customization screen. Here we will cover the basics.
click on it ‘Site ID’ in the left column.
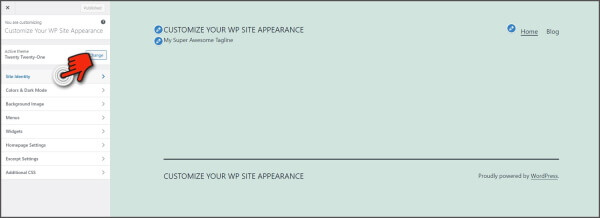
If you have a logo, you can download it by clicking on it “Select Logo” and download it from your computer through the few steps described below. Don’t forget to give your photo ‘subtext’ describing what the image is. Click when you’re done ‘Publish’ above to save your changes.
Select on the same page ‘Site Icon’ select in the left column and follow the same steps to add an image as above. The site icon will appear in your browser tab. It must be an image of 512 x 512 pixels or larger. A simple picture is best.
Return to the full set of customizer options by clicking the back arrow on the left ‘Site Identity Customization’. As mentioned above, each theme offers different options like background color and even typography. Play with the options available to you.
You can pass ‘Menus’ just as you have already created yourself and “Widgets” can be manipulated better “Widgets” under dashboard section ‘View’.
Click the ‘X’ icon at the top left of the screen to exit the Customizer.
8. Endless Additional Options
Above are the basic steps to start customizing your new blog. Different themes will offer different options and options, such as sidebars, footer columns, and even built-in widgets.
Widgets can be added to sidebars and footer columns via Appearance > Widgets in your dashboard.
With the Gutenberg editor, you can control the design and layout of every page and blog post with columns, blocks and widgets. This way, you can even create your own custom sidebars with different designs and widgets for different pages and posts.
9. Custom CSS
If the theme doesn’t provide easy options to adjust the elements you want to change, you can add your own custom CSS by clicking on it. ‘View’ and then “Customer”then select ‘Custom CSS’. If you need help adding CSS, visit WP support forums is a great place to find help with custom CSS changes.